2018-10-30 SAP-DS repos using CLI
Create a SAP-DS repo from CLI
A.K.A - Interpreting the SAP “admin guide” and a few guesses.
Goal
I wanted to create automation to delegate responsibility for teams to manage their own repositories, a path to automation requires an understanding of how to configure SAP-DS.
Background
Detailed Learning
start data services:
user@hostname~$/bobj/DS_Server_StartUp.sh
Within that it will show you how to get to the RDBMS startup script. Here you can get details for a ODBC driver to connect to the repo db:
user@hostname~$ grep '[A-Z]\+_[A-Z]\+=' /bobj/sap_bobj/sqlanywhere_startup.sh
SQLANYWHERE_CONFIGSCRIPT=/bobj/sqlanywhere/bin64/sa_config.sh
SQLANYWHERE_OTHER_DBFILE=/bobj/sqlanywhere/database/LR_ANY.db
SQLANYWHERE_SERVER=BI4_1234567899
SQLANYWHERE_PORT=2638
hence isql settings to connect to the repo from any host:
[MYREPO]
Userid=dba
DatabaseName=LR_THEREPO
ServerName=BI4_1234567899
Host=hostname:2638
Password=thepassword
Driver=SQLAnywhere 12.0 #OR direct path to driver
These settings need to be placed in the active ODBCINI file. This is either at /etc/odbc.ini or overridden with ~/.odbc.ini or overridden by the active ODBCINI environment setting. Hence the activeodbc.ini file for your host is:
user@hostname~$ env | grep ‘ODBCINI’
create a pre-requisite local database (taken From: SyBooks Online) noting:
- without -dba user=“dba” and passwd=“sql”
- special chars don’t require quoting in the password
- your $PATH needs to include /bobj/sqlanywhere/bin64 and
- your $LD_LIBRARY_PATH includes/bobj/sqlanywhere/lib64
- your database server is running, check ps -fC dbsrv12
user@hostname~$ dbinit -dba user,passwd /data/LR_USERNAME.db
Start the database without turning restarting the server:
- login to the server as the “dba” user (to any database)
- path to database file must be “single quoted”
- normally SQL_Anywhere defaults to AUTOSTOPon exit
user@hostname~$ isql -b LR_ANY <<<"START DATABASE '/data/sqlanywhere/DATA/LR_USERNAME.db' AUTOSTOP OFF;"
SQLRowCount returns -1
user@hostname~$ isql LR_USERNAME
+---------------------------------------+
| Connected!                            |
|                                       |
| sql-statement                         |
| help [tablename]                      |
| quit                                  |
|                                       |
+---------------------------------------+
SQL> quit;
Hence this is how to turn it off:
user@hostname~$ isql -b LR_ANY <<<"STOP DATABASE LR_USERNAME;"
SQLRowCount returns -1
user@hostname~$
create a new local repository:
- user/passwd are the admin credentials of your database
- “Q” value does not seem to be DSN just ODBC details
user@hostname~$ source /bobj/dataservices/bin/al_env.sh;
user@hostname~$ repoman -Udba -Ppasswd \
-NSQL_Anywhere -Slocalhost -s -QLR_USERNAME -p2638 -c -tlocal -d
Specifically sourcing this al_env.sh sets up the path and a few directories, by way of exports:
#if your source al_env.sh you DON'T need to run this.
export LD_LIBRARY_PATH=${LD_LIBRARY_PATH}:/bobj/dataservices/bin;
export LINK_DIR=/bobj/dataservices ;
export DS_COMMON_DIR=/bobj/dataservices;
Register the new repository,
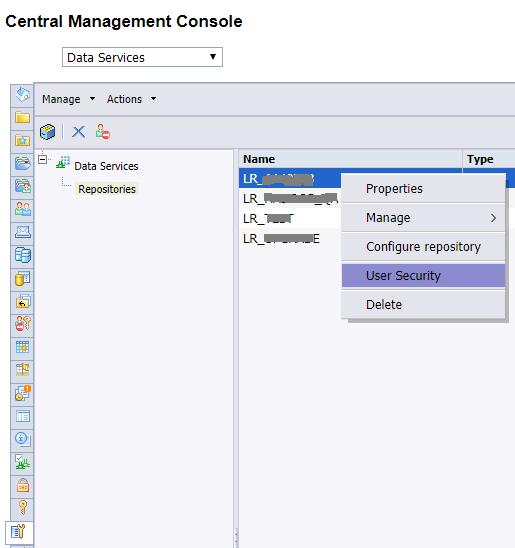
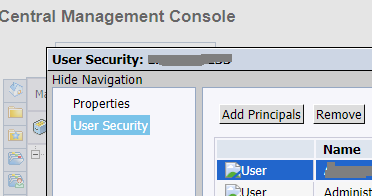
this project was not completed these actions should also be using CLI however show here in the UI for completeness login to the “Central Management Console” as the Administrator: http://dshost.localdomain:8080/BOE/CMC add the url to the database, the databasename, the admin user for the database (dba/sql) DSN will be derived so set “Use DSN” to “no”
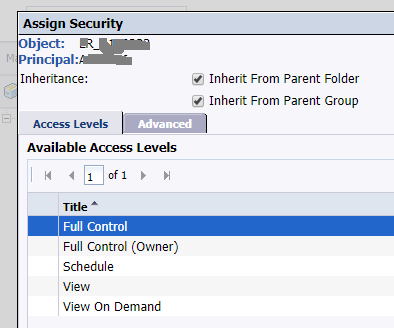
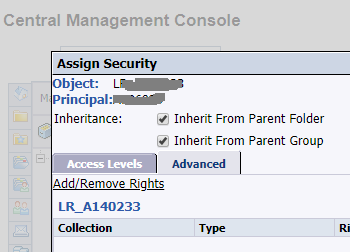
important: Data Services 14.2.5.118 1access levels are “missing” a critical privilege for “Full Control (Owner)” called “View objects”.
Hence you could chose “Full Control” or change the privileges of “Full Control (Owner)”.


- Select the principal and
- Move to “selected users” by pressing > arrow then
- press Add and Assign Security


